So I couldn’t sleep…
In Trivial Pursuit there are Roll Again squares around the rim, but none up the spokes – so it is always a bad strategy to go up the spokes. But how much better is it? You can compare the probabilities of landing on the square you want from any square to work that out.
For the centre square that’s easy. No throw will get you back to the centre. Then from wherever you land there is a 1/6 probability of landing back on it. Job done.
For a pie slice you want it is more complicated… Let’s number the squares, with 0 being your target square (and where we will begin):
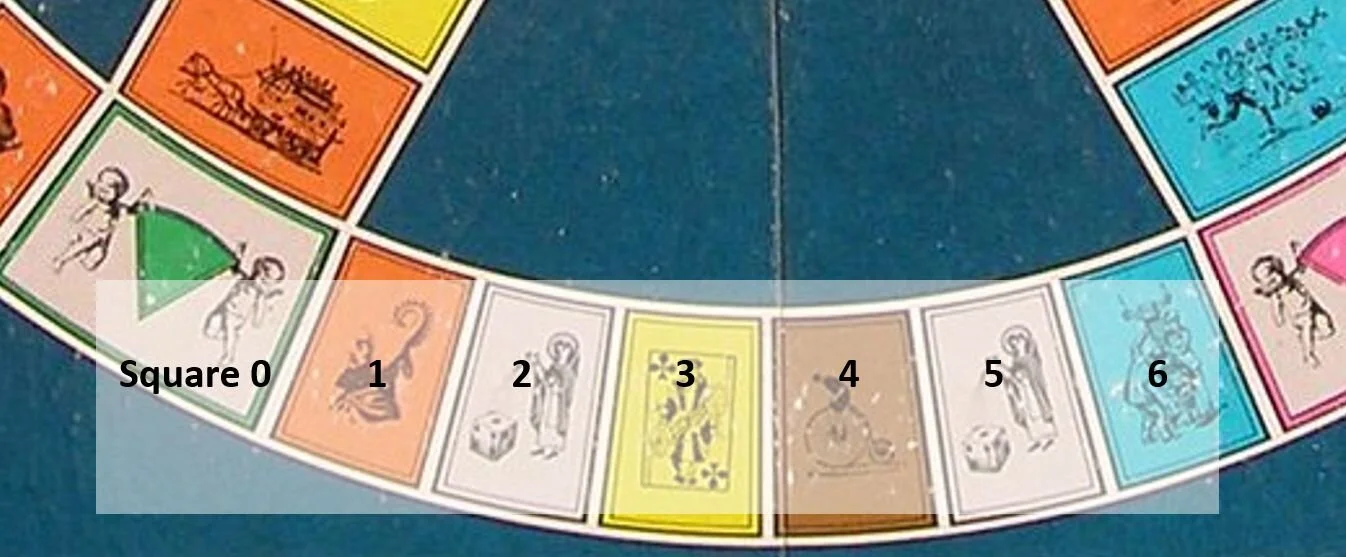
The board is symmetrical, so you can treat crossing a pie slice square the same as bouncing back from it – so for example four steps clockwise from square 2 returns you to square 2.
For simplicity, consider the non-target pie-slice to be a normal question.
Throw #0

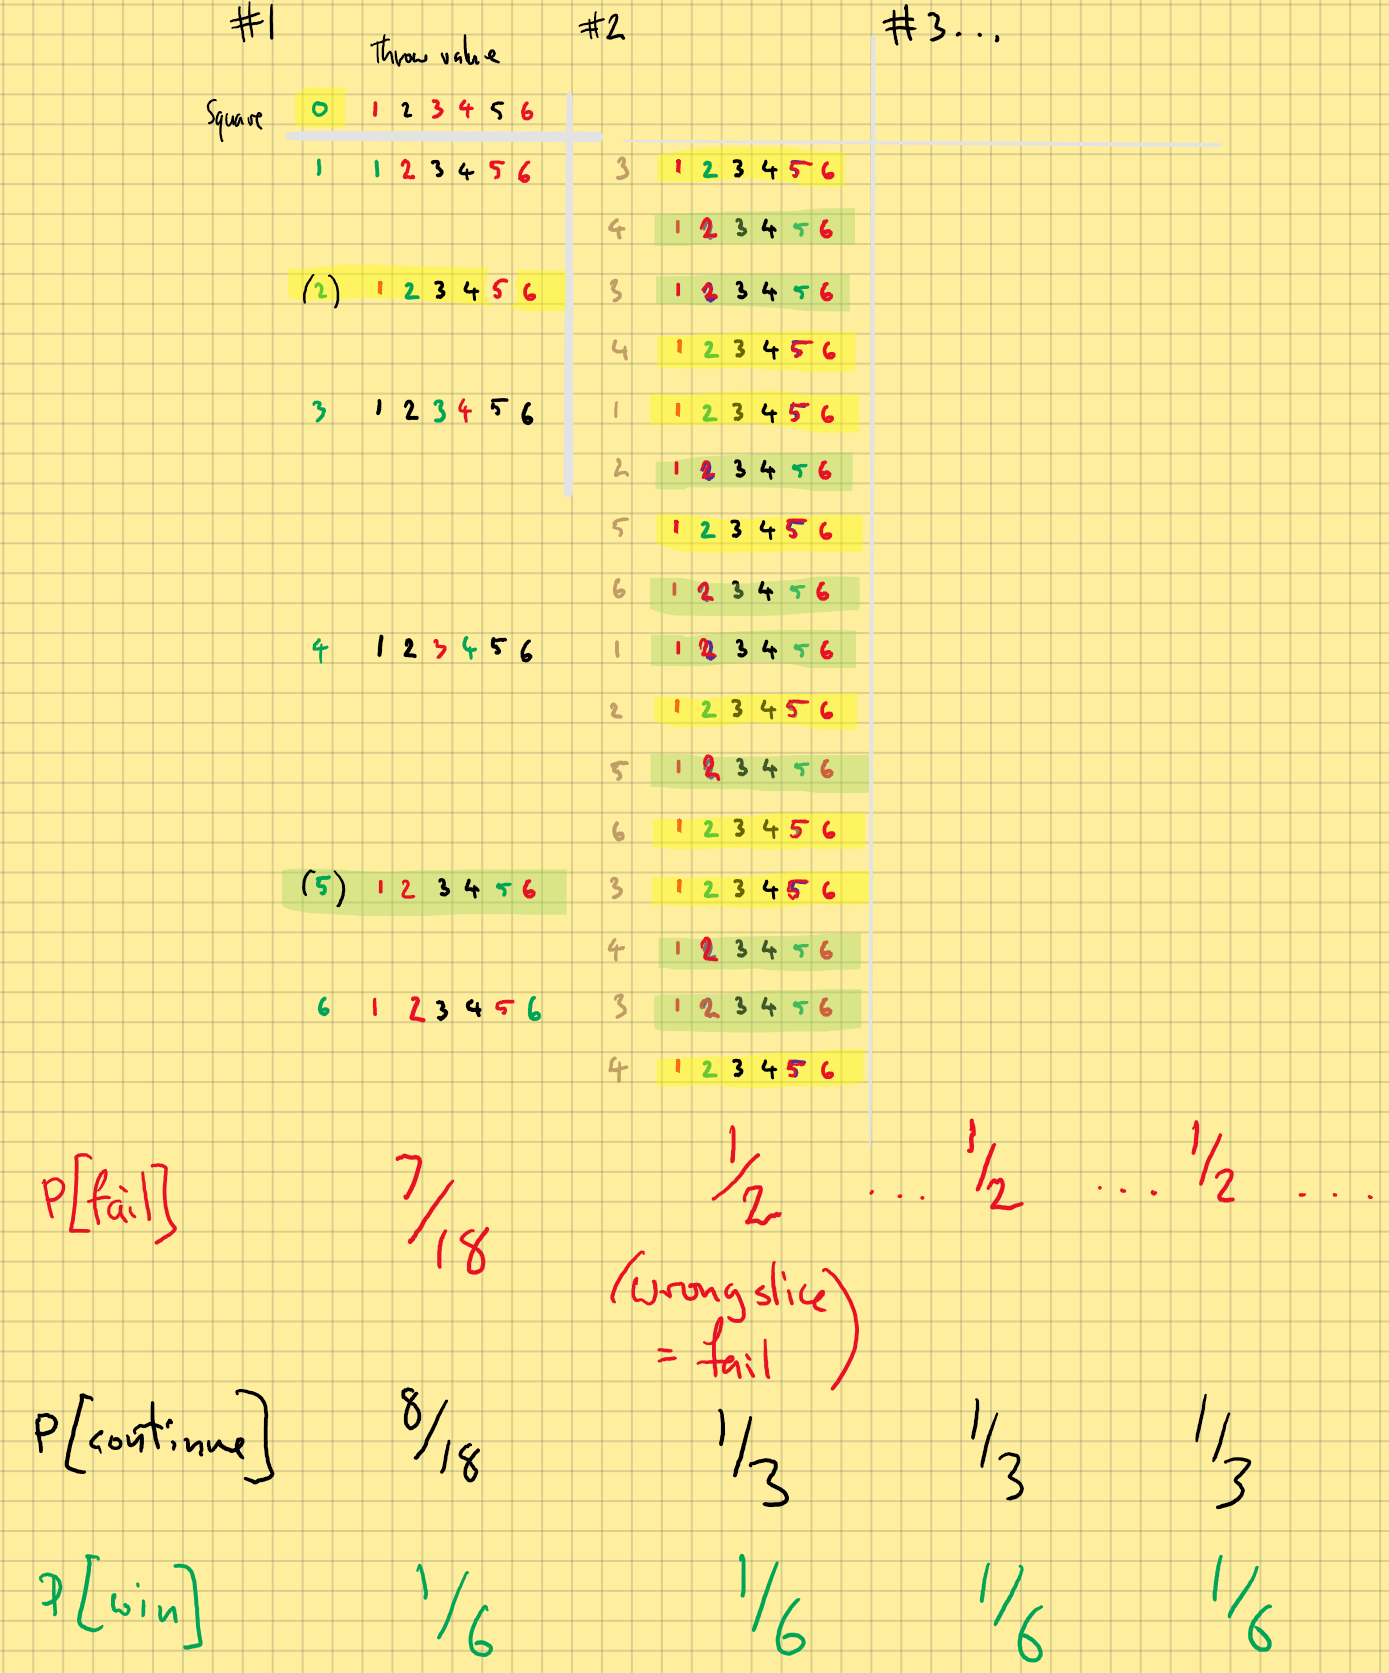
Your first throw from square 0, by itself, cannot get you back to square 0. It will only get you to the square with the same number as your dice-roll. From square 0, throws of 1, 3, 4, or 6 will end the run (that is, force you to answer a question). In my working they are red, for fail throws. A throw of 2 or 5 will give you a second throw. They are black, for still-in-play.
Let’s do the same thing for all the other squares, ie starting from square 1, 2, etc:
Throw #1

Squares 2 and 5 are Roll Again.
A roll of 1 from square 1 gets you to the pie-slice-you-want-square. That is green for win. Likewise a roll of 2 from 2, 3 from 3 etc…
The colours indicate the outcomes of each possible throw from each possible square. Win, Continue, or Fail. There are two possible outcomes for each throw (clockwise and anticlockwise), but this diagram supposes you pick most strategically, preferring the pie-slice square to a Roll Again, and a Roll Again to a question.
This whole picture is just throw #1, from any square.
Ignoring square 0, there are 6 throws from six squares (36 outcomes)
14 fails (reds) = 14/36 = 7/18
16 continues (blacks) = 16/36 = 8/18 = 4/9
6 wins (greens) = 6/36 = 1/6
The black throws will only take you to square 2 or square 5. So the second throw can only be from square 2 or square 5…
Throw #2

(The brown numbers are just the previous dice roll).
So a roll of 3 or 4 from square 1 on throw #1 gets you to square 2 or 5 respectively for throw two, and throw 2 outcomes are illustrated.
There are 96 possible outcomes for throw 2. However, the proportion of each outcome is the same for each starting square (the yellow or green highlighted ones). So it doesn’t matter how many sets of outcomes there are. There are:
3/6 fail (red) = 1/2
2/6 continue (black) = 1/3
1/6 win (green) = 1/6
*** This is the same for throws 3, 4, 5, …. n. ***
Throw n
The probability of winning on throw 1 =
The probability of winning on throw 2 =
The probability of winning on throw 3 =
The probability of winning on throw 4 =
The probability of winning on throw 5 =
The probability of winning on throw n =
P[1] =
P[2] =
P[3] =
P[4] =
P[5] =
P[n] =
1/6
4/9 x 1/6
4/9 x 1/3 x 1/6
4/9 x 1/3 x 1/3 x 1/6
4/9 x 1/3 x 1/3 x 1/3 x 1/6
4/9 x (1/3)^(n-2) x 1/6
= (2/27)*(1/3)^(n-2)
= 1/27 (see below)
Partial sum formula:

Decimal approximation: 0.037037037037037037
Convergence tests: By the geometric series test, the series converges.
Partial sum formula:
Partial Sums:

Throw 1 Onwards
The probability P of returning to your target-pie-slice-square, from is
P = P[1]+P[2]+…P[n]
P = 1/6 + (4/9 x 1/6) + 1/27
P = 5/18
So it’s 3/18 in throw 1, then an additional 2/18 for all throw combinations thereafter!
(And you should try to land on 3 or 4 if you can’t get your slice.)
Back to sleep…